Android字体系列 (一):Android字体基础

前言
很高兴遇见你~
最近接到一个需求,大致内容是:全局替换当前项目中的默认字体,并引入 UI 设计师提供的一些新字体。于是对字体做了些研究,把自己的一些心得分享给大家。
注意:本文所展示的系统源码都是基于Android-30 ,并提取核心部分进行分析
一、Android 默认字体介绍
1、Android 系统默认使用的是一款叫做 Roboto 的字体,这也是 Google 推荐使用的一款字体 传送门。它提供了多种字体形式的选择,例如:粗体,斜体等等。
2、在 Android 中,我们一般会直接或间接的通过 TextView 控件去承载字体的显示,因为关于 Android 提供的承载字体显示的控件都会直接或间接继承 TextView,例如:EditText,Button 等等,下面给出一张 TextView 继承图:

3、TextView 中有三个属性可以设置字体的显示:
1)、textStyle
2)、typeface
3)、fontFamily
下面我们重点介绍下这三个属性
二、textStyle
textStyle 主要用来设置字体的样式,我们看下它在 TextView 的自定义属性中的一个体现:
1 | |
从上述自定义属性中我们可以知道:
1、textStyle 主要有 3 种样式:
- normal:默认字体
- bold:粗体
- italic:斜体
2、textStyle 是用 flag 来承载的,flag 表示的值可以做或运算,也就是说我们可以设置多种字体样式进行叠加
接下来我们在 xml 中设置一下,如下图:
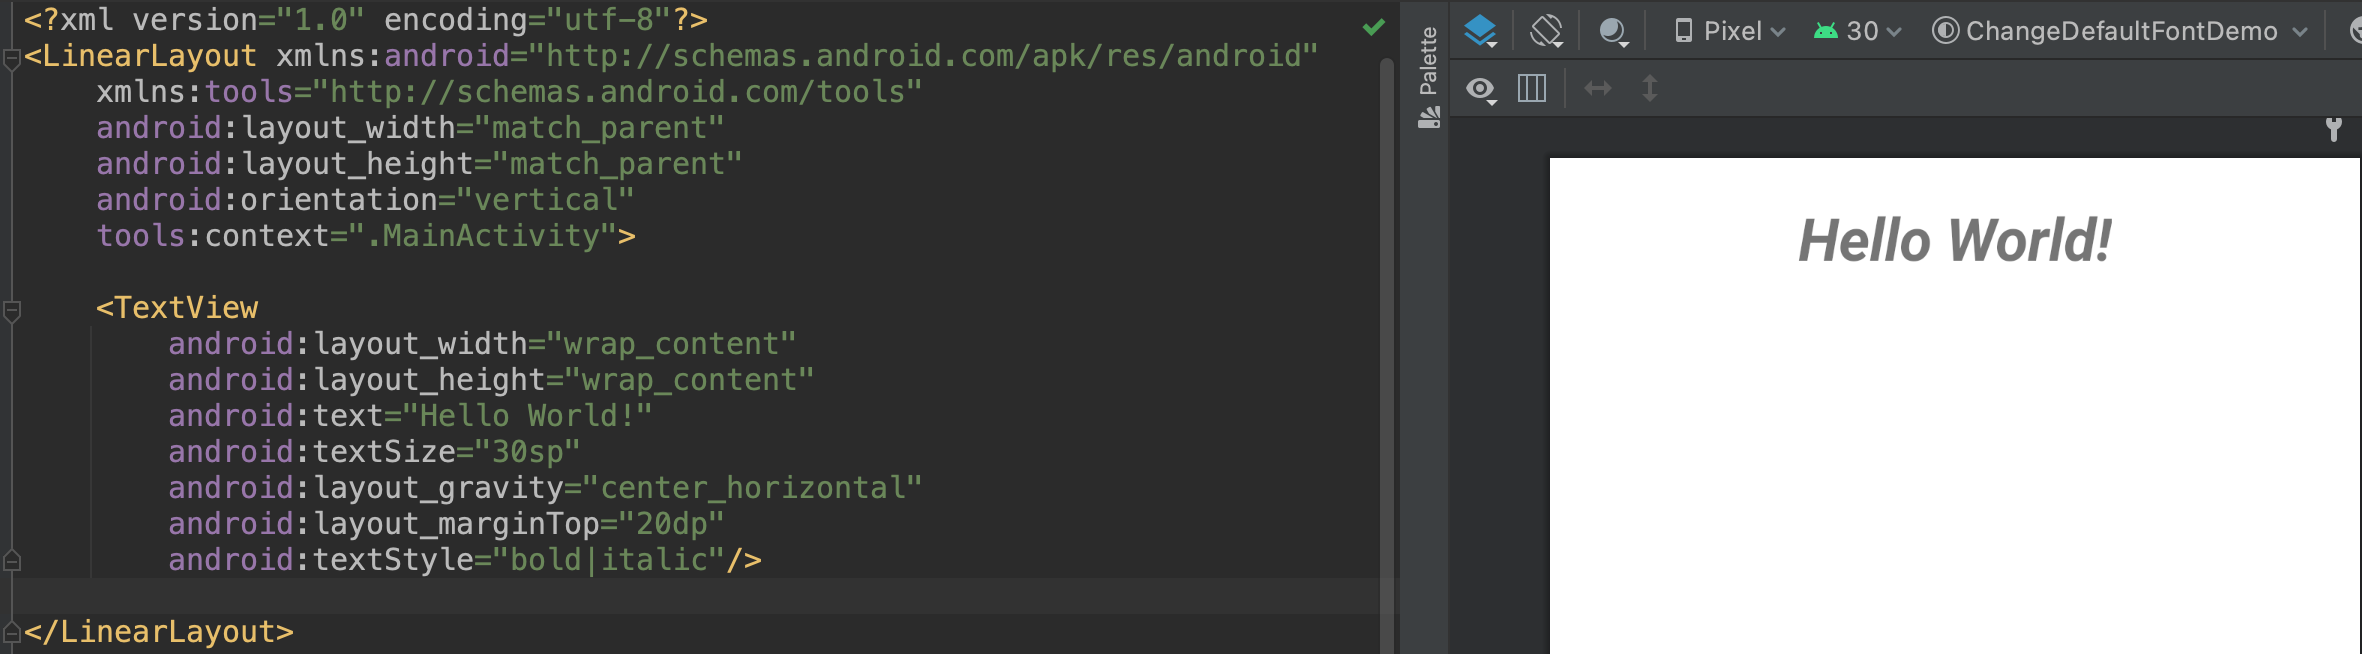
可以看到,我们给 TextView 的 textStyle 属性设置了粗体和斜体两种样式叠加,右边可以看到预览效果
同样我们也可以在代码中对其进行设置,但是在代码中设置字体样式只能设置一种,不能叠加:
1 | |
三、typeface
typeface 主要用于设置 TextView 的字体,我们看下它在 TextView 的自定义属性中的一个体现:
1 | |
从上述自定义属性中我们可以知道:
1、typeface 提供了 4 种字体:
- noraml:普通字体,系统默认使用的字体
- sans:非衬线字体
- serif:衬线字体
- monospace:等宽字体
2、typeface 是用 enum 来承载的,enum 表示枚举类型,每次只能选择一个,因此我们每次只能设置一种字体,不能叠加
接下来我们在 xml 中设置一下,如下图:
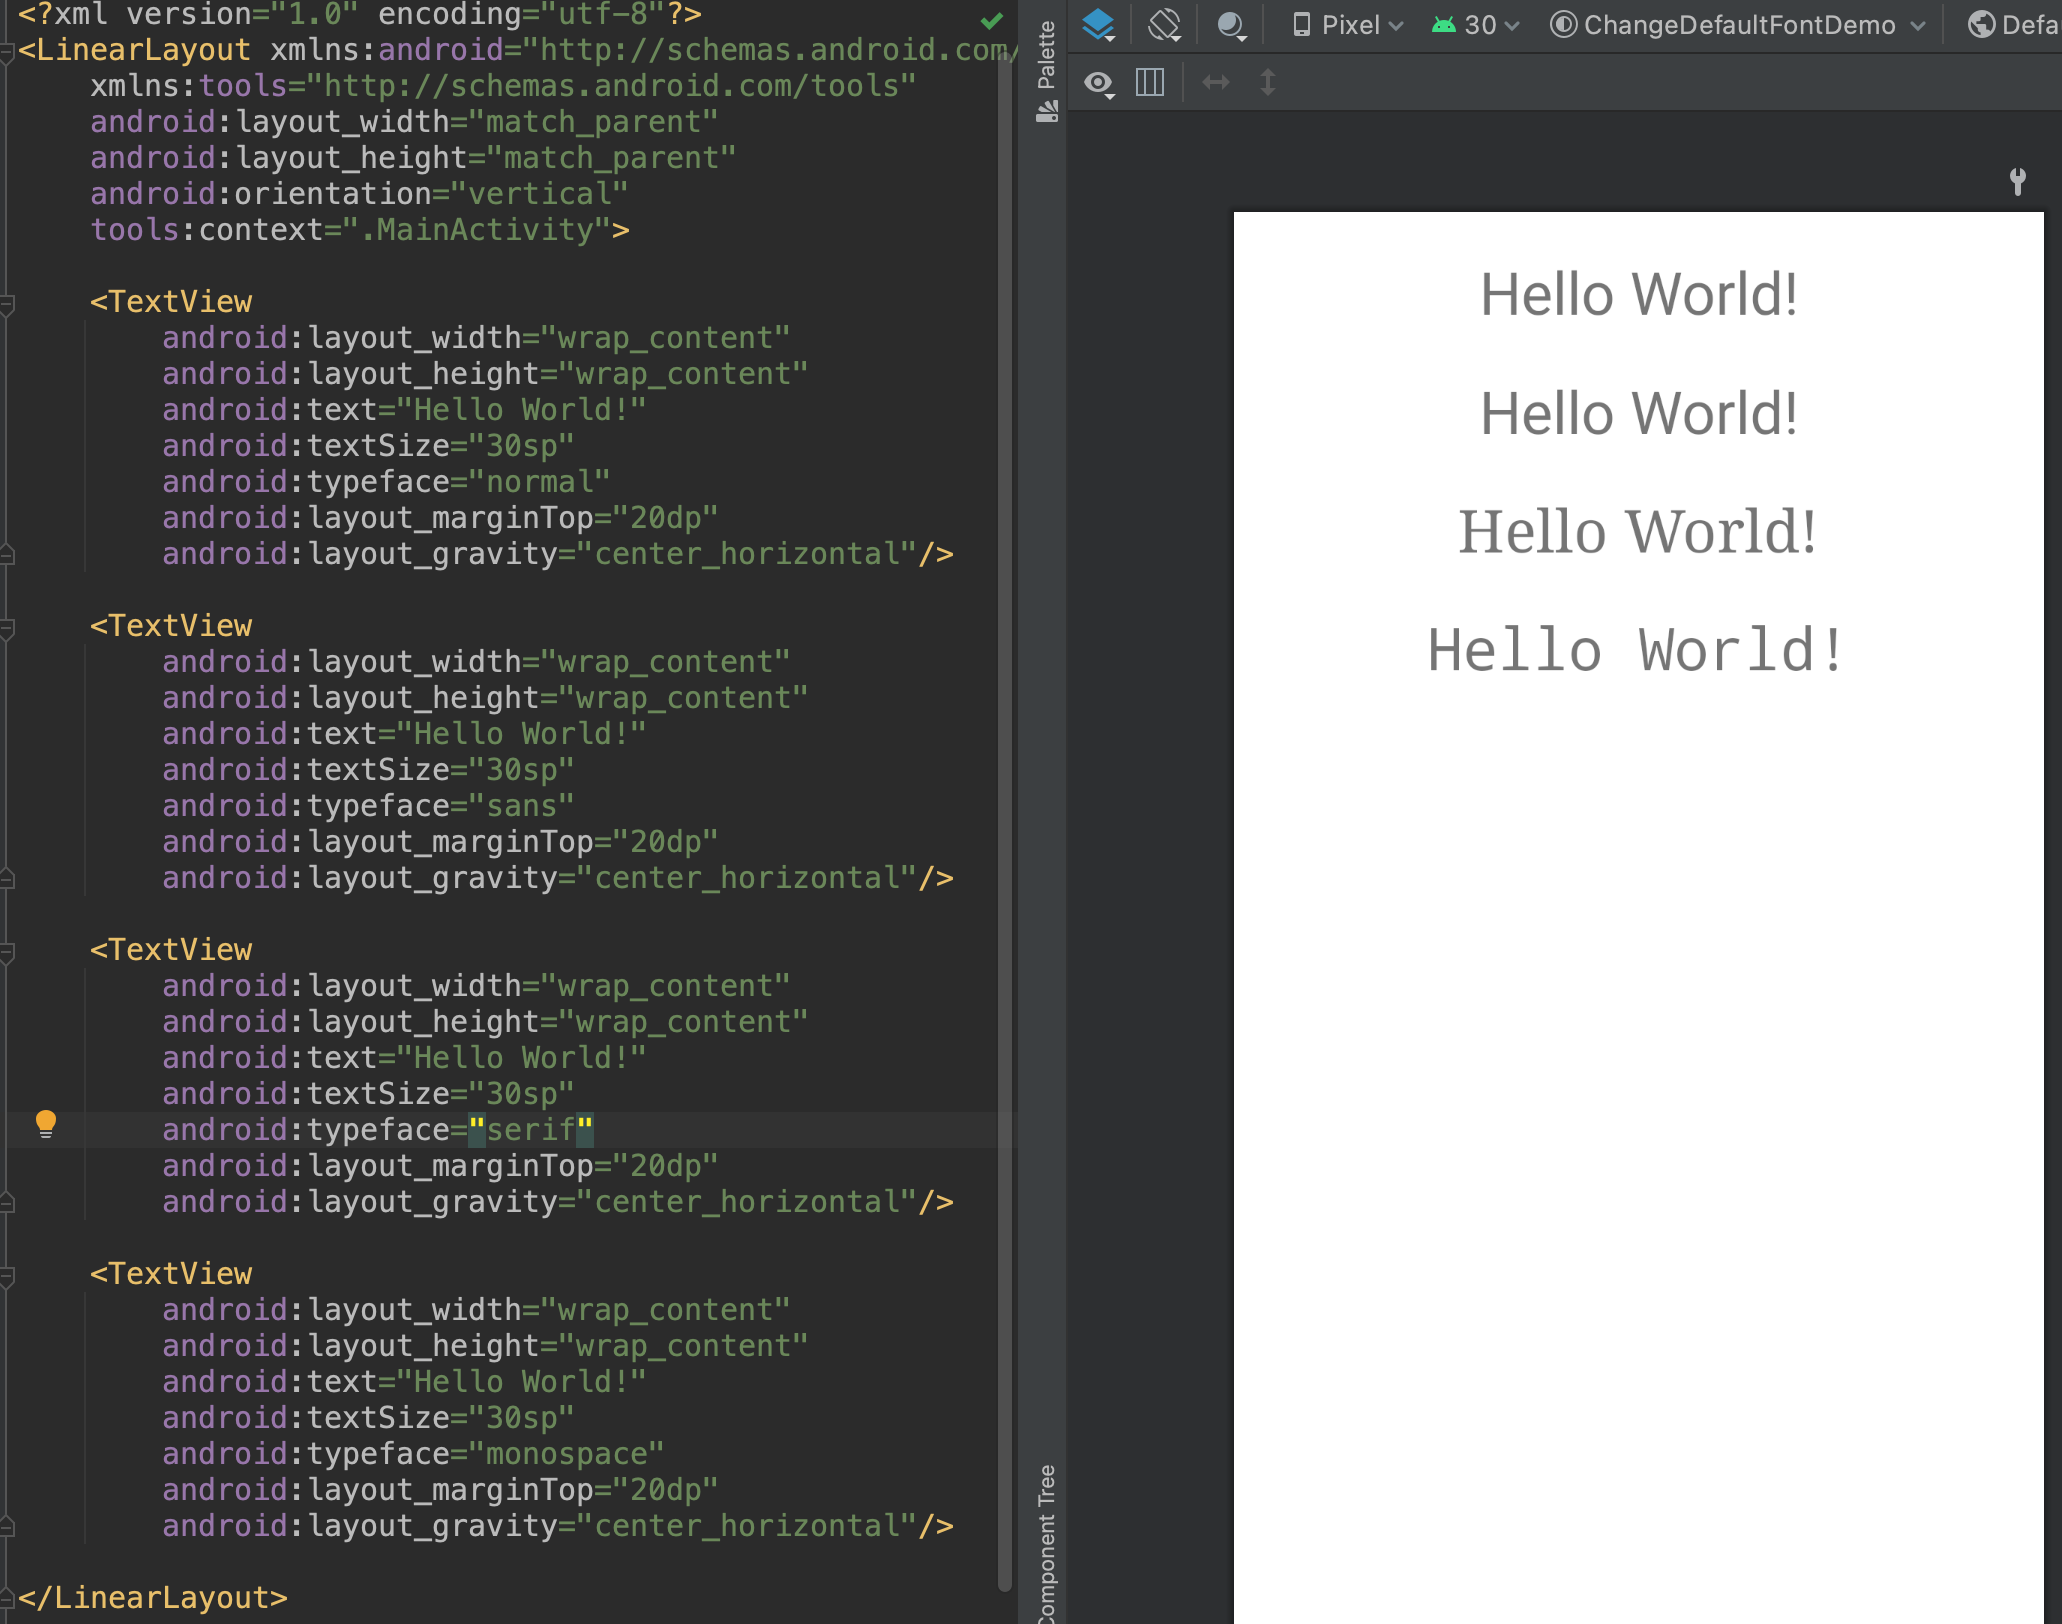
简单介绍这几种字体的区别:
serif (衬线字体):在字的笔划开始及结束的地方有额外的装饰,而且笔划的粗细会因直横的不同而有不同相
sans (非衬线字体):没有 serif 字体这些额外的装饰,和 noraml 字体是一样的

monospace (等宽字体):限制每个字符的宽度,让它们达到一个等宽的效果
同样我们也可以在代码中进行设置:
1 | |
四、fontFamily
fontFamily 相当于是加强版的 typeface,它表示 android 系统支持的一系列字体,每个字体都有一个别名,我们通过别名就能设置这种字体,看下它在 TextView 的自定义属性中的一个体现:
1 | |
从上述自定义属性中我们可以知道:
fontFamily 接收的是一个 String 类型的值,也就是我们可以通过字体别名设置这种字体,如下图:
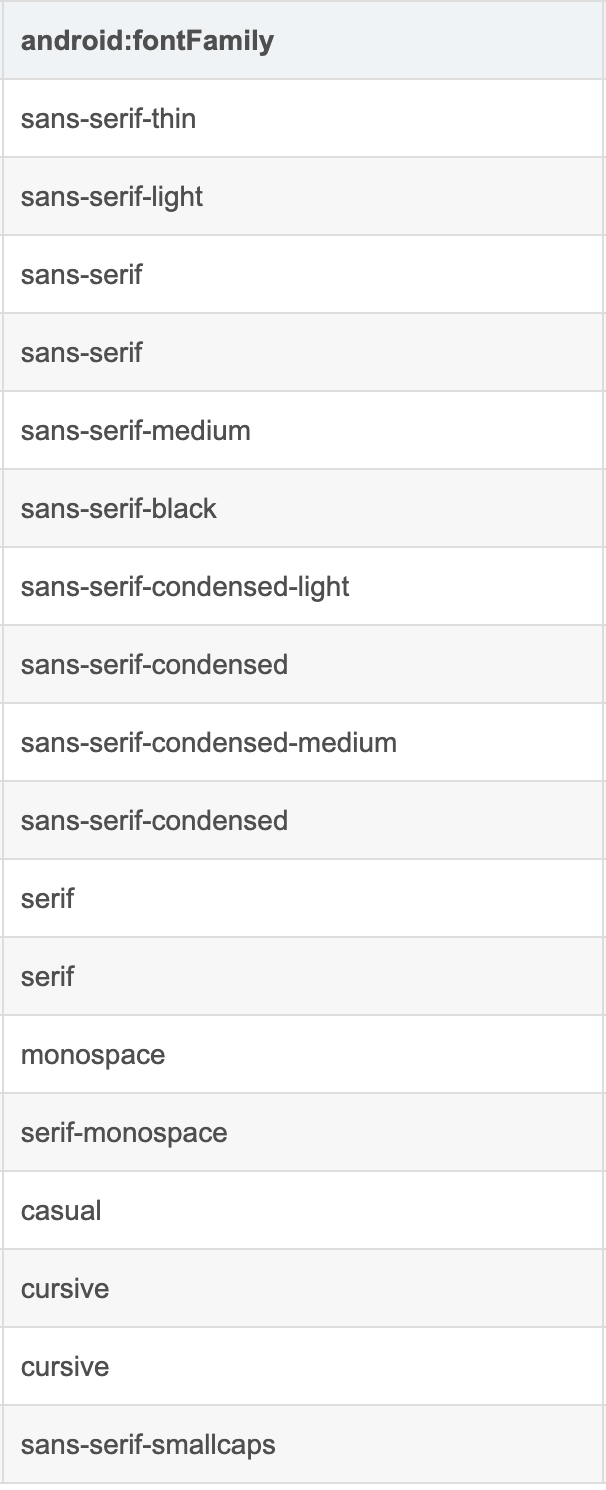
可以看到,它细致的区分了每个系列字体的样式,同样我们在 xml 中对它进行一个设置:
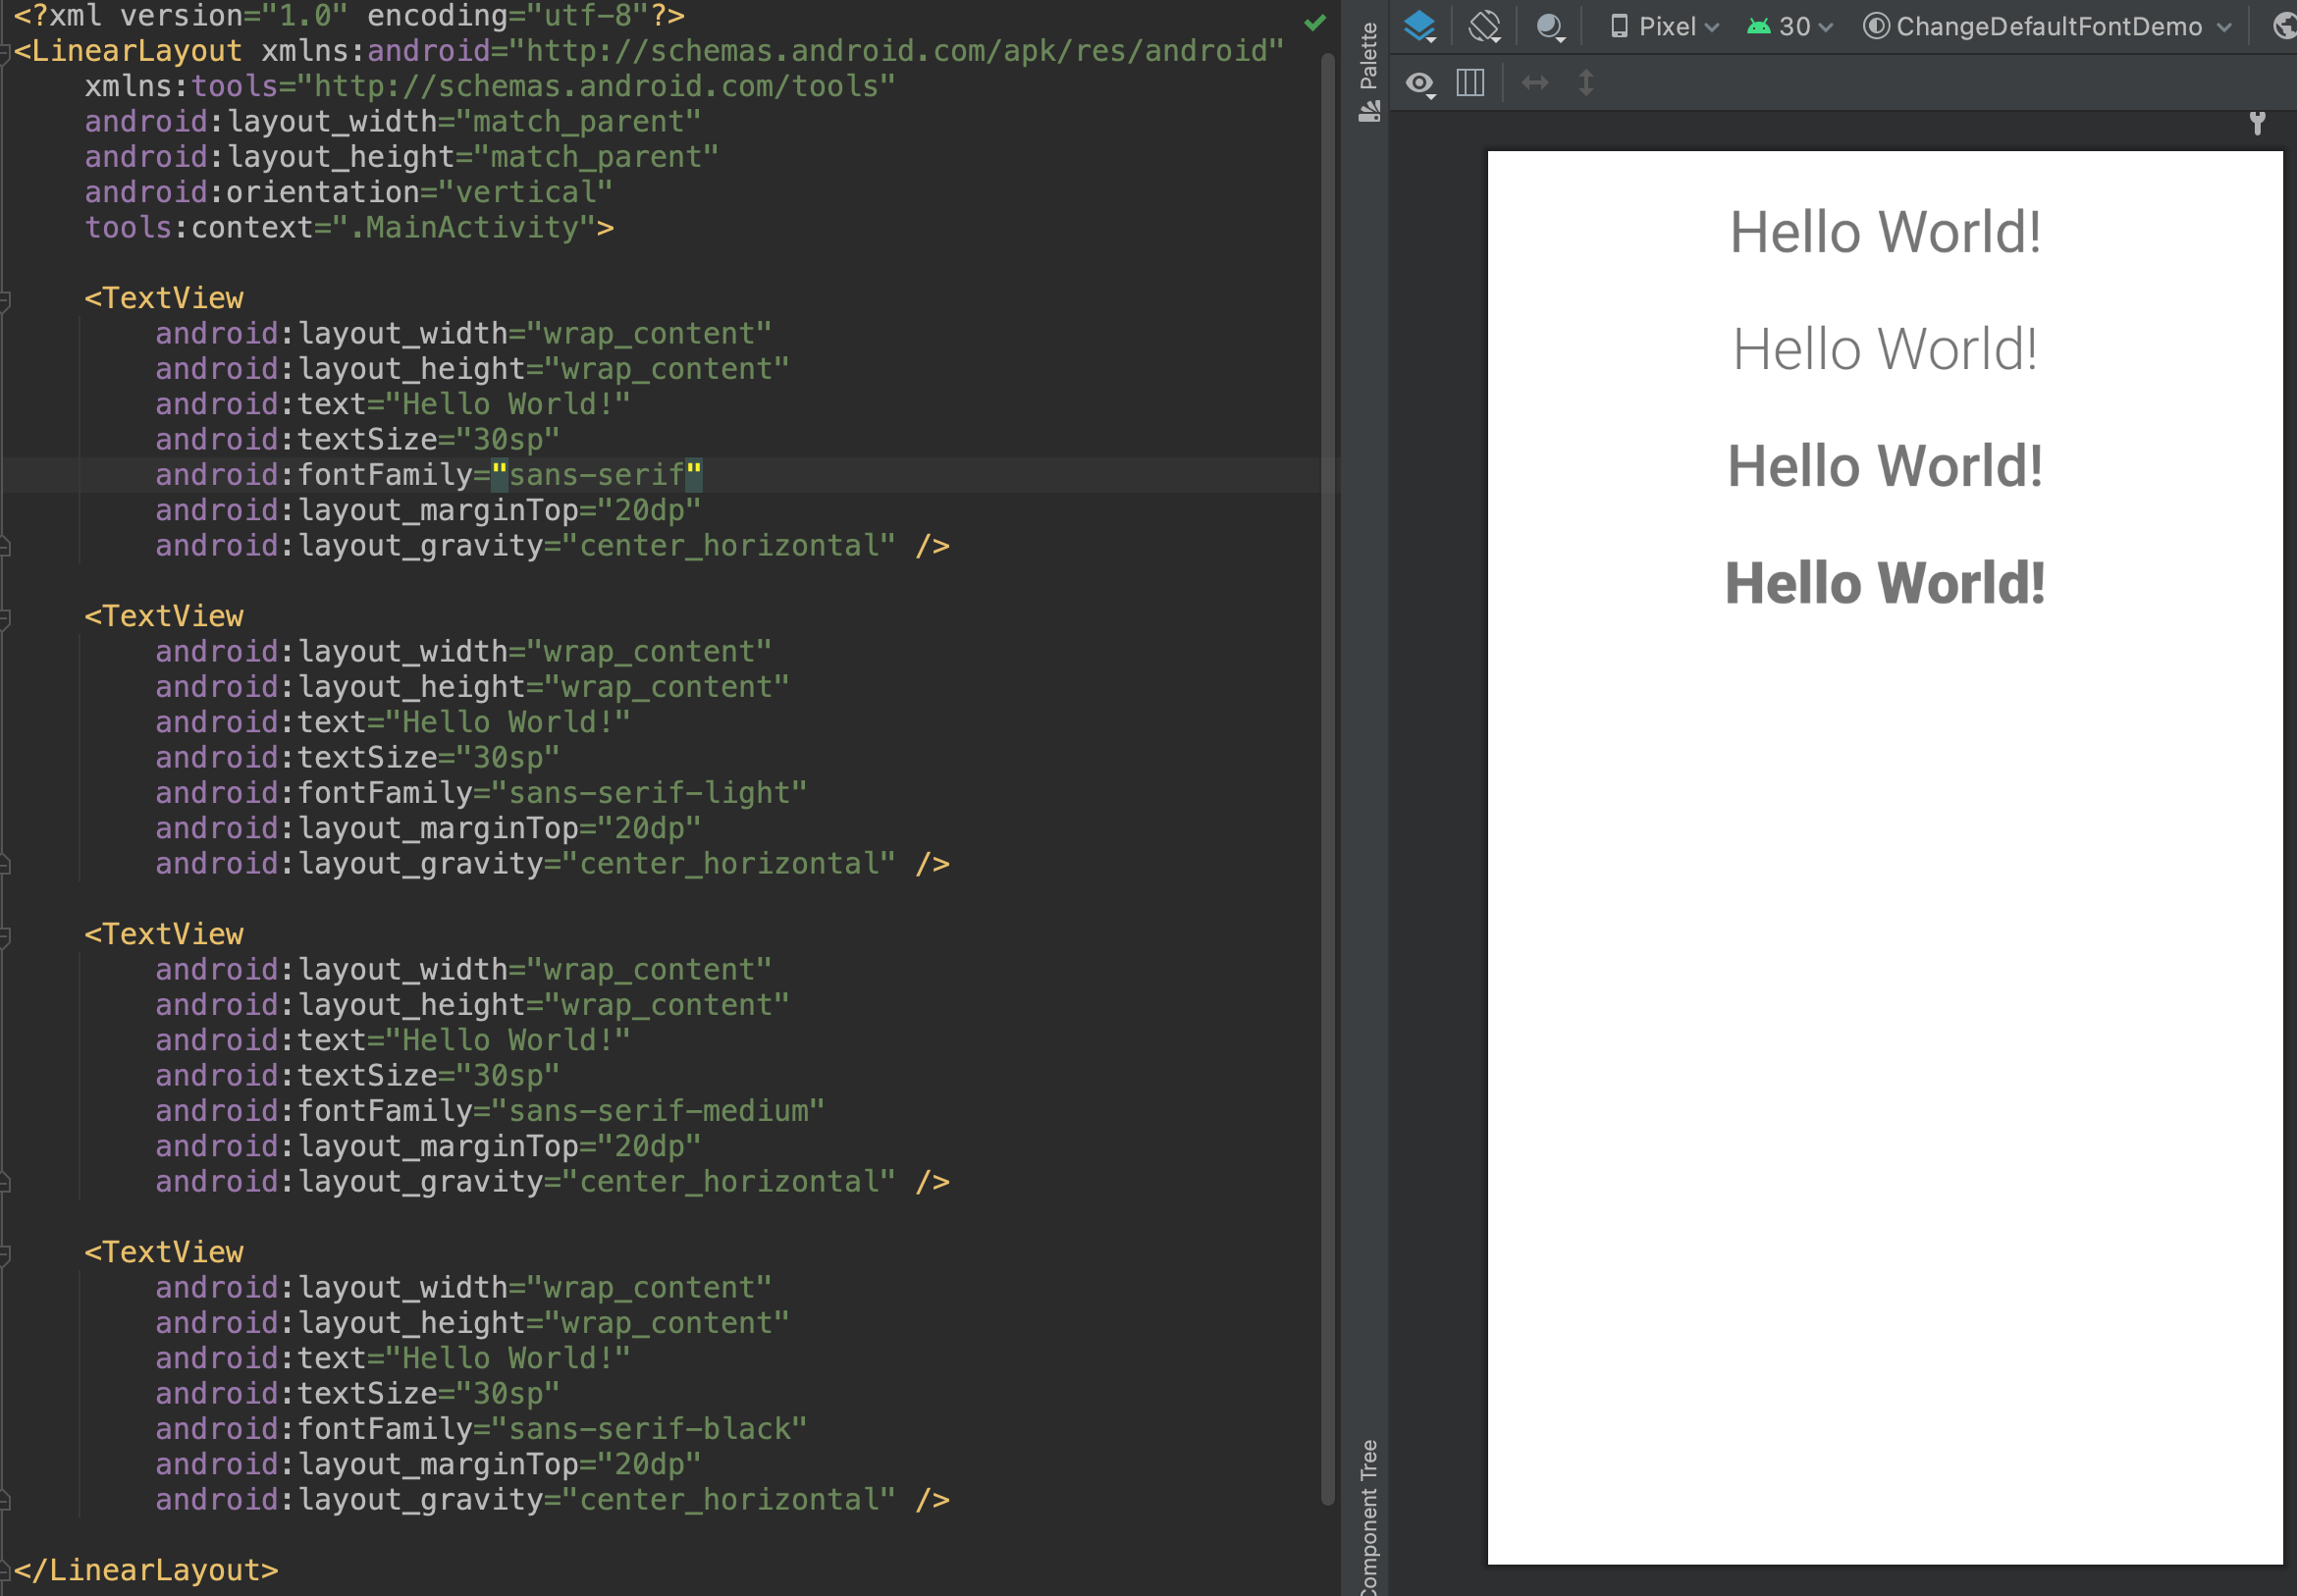
我们在代码中在对他进行一个设置:
1 | |
值的注意的是:fontFamily 设置的某些字体有兼容性问题,如我上面设置的 sans-serif-medium 字体,它在 Android 系统版本大于等于 21 才会生效,如果小于 21 ,则会使用默认字体,因此我们在使用 fontFamily
属性时,需要注意这个问题
到这里,我们就把影响 Android 字体的 3 个属性给讲完了,但是我心里有个疑问🤔️ ?假设我这三个属性同时设置,会一起生效吗?
带着这个问题,我们探索一下源码
五、textStyle,typeface,fontFamily 三者关系分析
TextView 在我们使用它之前需进行一个初始化,最终会调用它参数最多的那个构造方法:
1 | |
上面这条调用链,首先会读取 TextView 设置的相关属性,我们看下与字体相关的几个:
1 | |
从上述代码中我们可以看到:
1、当我们设置 typeface 属性时,会将对应的属性值赋给 mTypefaceIndex ,并把 mFontFamily 置为 null
2、当我们设置 fontFamily 属性时,首先会通过 appearance.getFont() 方法去获取字体文件,如果能获取到,则赋值给 mFontTypeface,如果获取不到,则通过 appearance.getString() 方法取获取当前字体别名并赋值给 mFontFamily
注意:当我们给 fontFamily 设置了一些第三方字体,那么此时 appearance.getFont() 方法就获取不到字体
3、当我们设置 textStyle 属性时,会将获取的属性值赋给 mTextStyle
上述方法走完了,会调 setTypefaceFromAttrs() 方法,这个方法就是最终 TextView 设置字体的方法,我们来解析下这个方法:
1 | |
上述代码步骤:
1、当 typeface 为空并且 familyName 不为空时,取 familyName 的字体
2、当 typeface 不为空并且 familyName 为空时,取 typeface 的字体
3、当 typeface 和 familyName 都为空,则根据 typefaceIndex 的值取相应的字体
4、typeface ,familyName 和 typefaceIndex 在我们分析的 readTextAppearance 方法会被赋值
5、resolveStyleAndSetTypefce 方法会进行字体和字体样式的设置
6、style 是在 readTextAppearance 方法中赋值的,他和设置字体并不冲突
好,现在代码分析的差不多了,我们再来看下上面那个疑问?我们使用假设法来进行推导:
假设在 Xml 中, typeface,familyName 和 textStyle 我都设置了,那么根据上面分析:
1、textStyle 肯定会生效
2、当设置了 typeface 属性,typefaceIndex 会被赋值,同时 familyName 会置为空
3、当设置了 familyName 属性,分情况:1、如果设置的是系统字体,typeface 会被赋值,familyName 还是为空。2、如果设置的是第三方字体,typeface 为空,familyName 被赋值
因此,当我们设置了这个三个属性,typeface 和 familyName 总有一个不会为空,因此不会走第三个条件体,那么 typeface 设置的属性就不会生效了,而剩下的两个属性都能够生效
最后对这三个属性做一个总结:
1、fontFamily、typeface 属性用于字体设置,如果都设置了,优先使用 fontFamily 属性,typeface 属性不会生效
2、textStyle 用于字体样式设置,与字体设置不会产生冲突
上面这段源码分析可能有点绕,如果有不清楚的地方,欢迎评论区给我留言提问
六、TextView 设置字体属性源码分析
通过上面源码的分析,我们清楚了 fontFamily,typeface 和 textStyle 这三者的关系。接下来我们研究一下,我们设置的这些属性是怎么实现这些效果的呢?又到了源码分析环节😂,可能会有点枯燥,但是如果你能够认真看完,一定会收获很多,干就完了
我们上面用 Xml 或代码设置的字体属性,最终都会走到 TextView 的 setTypeface 重载方法:
1 | |
分析下上述代码:
重载方法一:
TextView 设置字体实际上就是操作 mTextPaint,mTextPaint 是 TextPaint 的类对象,继承自 Paint 即画笔,因此我们设置的字体实际上会通过调用画笔的方法来进行绘制
重载方法二:
相对于重载方法一,法二多传递了一个 textStyle 参数,主要用来标记粗体和斜体的:
1)、如果设置了 textStyle ,进入第一个条件体,分情况:1、如果传进来的 tf 为 null ,则会根据传入的 style 去获取 Typeface 字体,2、如果不为 null ,则会根据传入的 tf 和 style 去获取 Typeface 字体。设置好字体后,接下来还会打开画笔的粗体和斜体设置
2)、如果没有设置 textStyle,则只会设置字体,并把画笔的粗斜体设置置为 false 和 0
从上述分析我们可以得知:TextView 设置字体和字体样式最终都是通过画笔来完成的
七、总结
本篇文章主要讲了:
1、Android 字体大概的一个介绍
2、关于影响 Android 字体显示的三个属性
3、textStyle,typeface,fontFamily 三者的一个关系
4、设置的这三个属性是怎么实现这些效果的?
可能大家会问,你上面那个需求还没讲怎么就要结束了呢?我上面那个需求,以今天所讲的知识可能还实现不了,别着急,关于 Android 字体我准备写个系列,因为内容实在是太多了。这个系列文章不会让大家等太久,因为在参加掘金 6 月更文挑战,准备爆肝 9 篇😄
好了,本篇文章到这里就结束了,如果有任何问题,欢迎给我留言,我们评论区一起讨论🤝
感谢你阅读这篇文章
你的点赞,评论,是对我巨大的鼓励!
欢迎关注我的公众号: sweetying ,文章更新可第一时间收到
如果有问题,公众号内有加我微信的入口,在技术学习、个人成长的道路上,我们一起前进!